Refoaming
Oo, I'm posting in the DIY category...
Stand back folks.
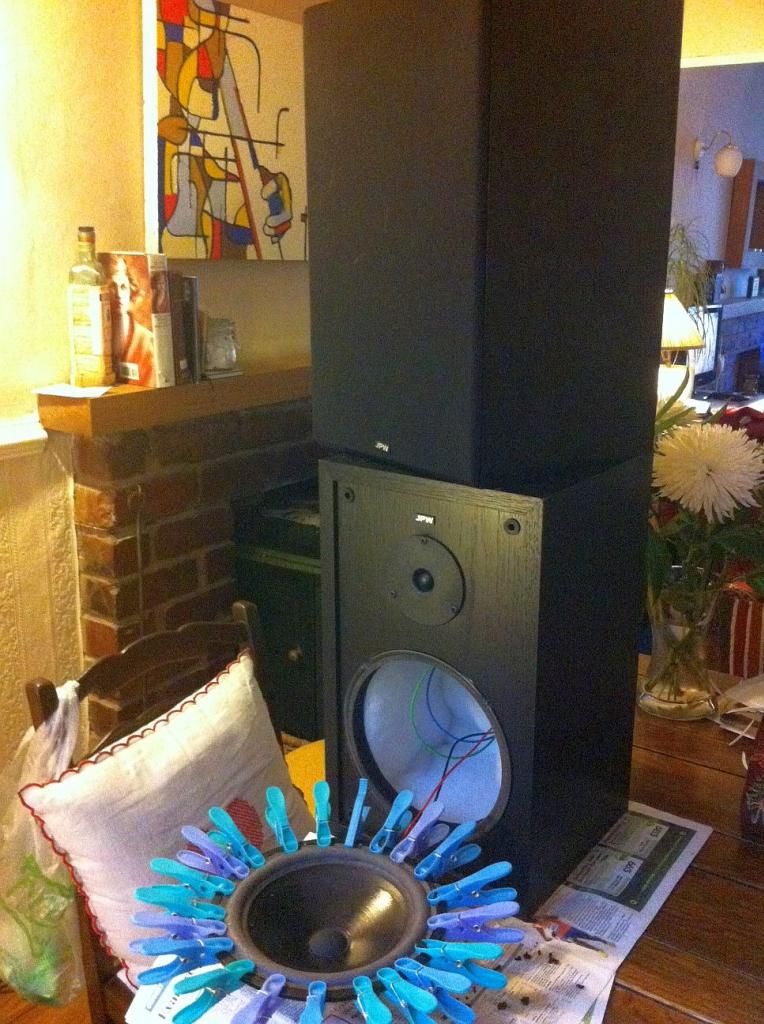
I recently decided to refoam a pair of old JPW speakers (I think they're AP2s), that were given to me a few years ago. At the time the surrounds were perishing and it was suggested that to prolong their life I could put some Bison Kit contact adhesive over the cracks. This I did and it worked pretty well for a while.
I haven't used the speakers for a couple of years and they were resting in the loft. I got them down 2 weeks ago and was disappointed to find that what remained of the surrounds was beyond repair. Not wanting to discard what are 2 very nice sounding speakers I decided to attempt a "refoam".
I sourced the relevant surrounds on the internet (from Holland as it turned out) and they arrived this morning.
In preparation I had also looked at glue choices and had purchased some Elmers multi purpose glue.
To learn the craft I studied a few Youtube videos which all presented broadly similar techniques.
The process went reasonably well, with one exception.
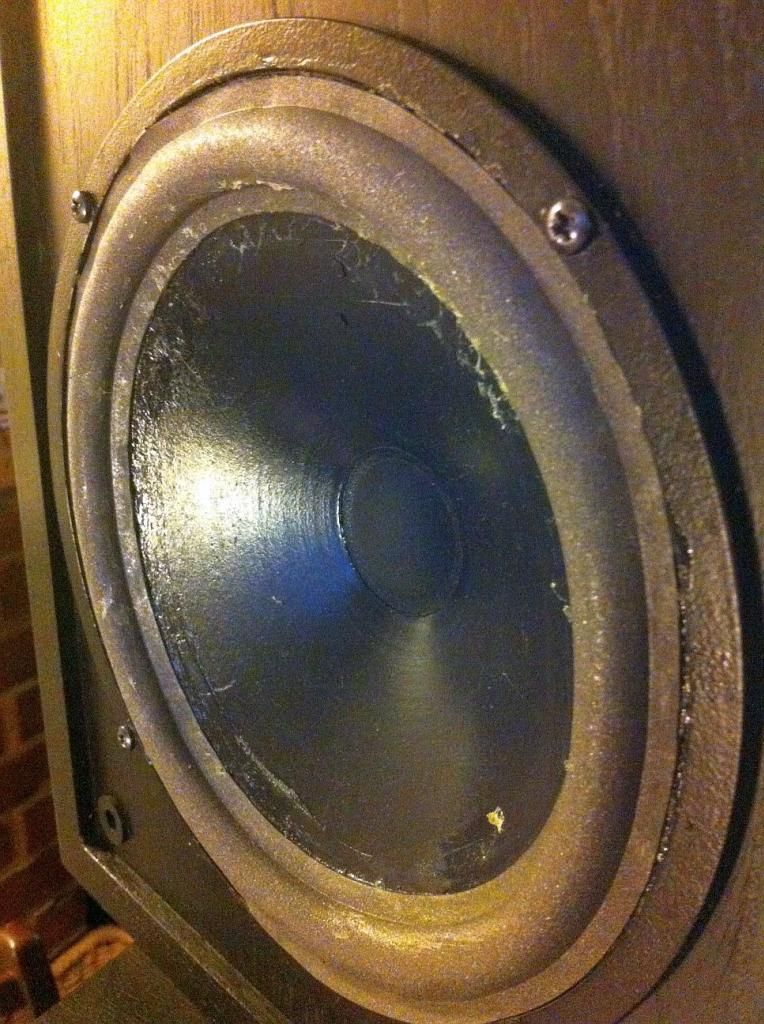
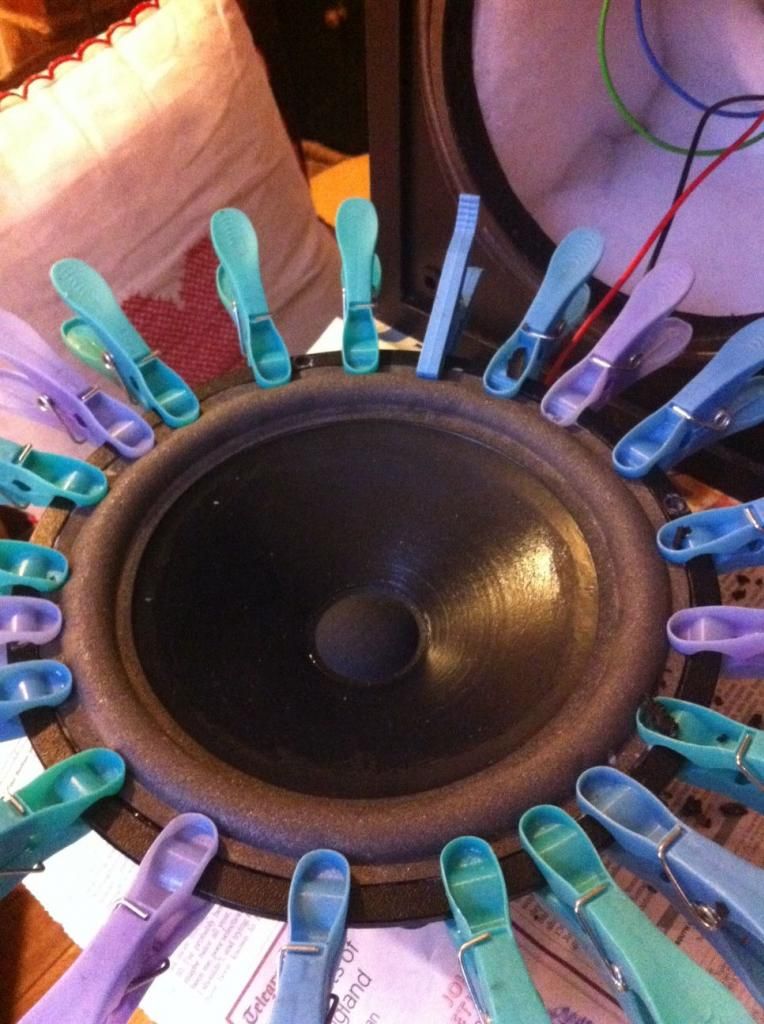
For some reason when it came to my gluing in the first surround I made the decision to use the Bison adhesive that I had once used to hold the old surrounds together. Why I made this choice having purchased a different glue recommended for this very job, I do not know. Whatever the reason, it turned out to be a near-fatal error. The Bison glue caused the surround to ripple and distort slightly. I was only able to half-salvage the situation by judicious use of clothes pegs, that fortunately I had at the ready following one internet source that had recommended them for clamping surfaces together during drying. My panicked attempts to remove excessive glue also have left streaks over the cone. These may peel off I suppose.
At least the Bison dries quickly and now dry, even though it looks like the shit sandwich it is, it does work and sounds fine. Also, the speaker grilles are in good nick, so no-one need ever gaze upon this ugly monstrosity...

When attempting the second refoam, I used the Elmers, and things went better. Also the Elmers dries clear, so any overflow is largely invisible. Having said that, the Elmer was significantly less sticky and took longer to dry, so even though the finished result looks a lot better, it took bloody ages, and did rely on the clothes pegs again (it's not yet dry enough to test out)...

BTW the drivers are still connected because the connecting wires are soldered on, and I couldn't be arsed re-soldering.
Has anyone here ever tried this? If so, what glue did you use, I wasn't really impressed with either (though would definitely choose the Elmers over the Bison).
Also, I found that the removed surround (which obviously disintegrated into tiny pieces) ended up with the consistency of tar. I had newpaper down so it was mostly contained, but a few bits dropped onto my laminate flooring. It was easily enough to scrub it off that, but I wouldn't have fancied my chances on a carpet. So take care with that.
One final point. Many of the Youtube videos recommended removing the dustcaps during refoaming. This is because it allows spacers to be placed inbetween the voicecoil and the cone, the idea being that if re-glued off-centre the cone will rub against the coil creating a farting noise. I wanted to avoid removing the dust caps and took confidence from a few videos that showed how this could be avoided simply by testing for, and avoiding rub by hand and ear during the gluing process. This worked for me. Tbh it happened automatically, and no readjustment was needed from the first position I tried. Whether I was lucky, or this tends to be the case, I don't know.
Anyway, despite the shambles with the wrong glue, and my generally ham-fistedness I do enjoy these things, and am pleased I've rendered my JPW usable again.

Stand back folks.
I recently decided to refoam a pair of old JPW speakers (I think they're AP2s), that were given to me a few years ago. At the time the surrounds were perishing and it was suggested that to prolong their life I could put some Bison Kit contact adhesive over the cracks. This I did and it worked pretty well for a while.
I haven't used the speakers for a couple of years and they were resting in the loft. I got them down 2 weeks ago and was disappointed to find that what remained of the surrounds was beyond repair. Not wanting to discard what are 2 very nice sounding speakers I decided to attempt a "refoam".
I sourced the relevant surrounds on the internet (from Holland as it turned out) and they arrived this morning.
In preparation I had also looked at glue choices and had purchased some Elmers multi purpose glue.
To learn the craft I studied a few Youtube videos which all presented broadly similar techniques.
The process went reasonably well, with one exception.
For some reason when it came to my gluing in the first surround I made the decision to use the Bison adhesive that I had once used to hold the old surrounds together. Why I made this choice having purchased a different glue recommended for this very job, I do not know. Whatever the reason, it turned out to be a near-fatal error. The Bison glue caused the surround to ripple and distort slightly. I was only able to half-salvage the situation by judicious use of clothes pegs, that fortunately I had at the ready following one internet source that had recommended them for clamping surfaces together during drying. My panicked attempts to remove excessive glue also have left streaks over the cone. These may peel off I suppose.
At least the Bison dries quickly and now dry, even though it looks like the shit sandwich it is, it does work and sounds fine. Also, the speaker grilles are in good nick, so no-one need ever gaze upon this ugly monstrosity...

When attempting the second refoam, I used the Elmers, and things went better. Also the Elmers dries clear, so any overflow is largely invisible. Having said that, the Elmer was significantly less sticky and took longer to dry, so even though the finished result looks a lot better, it took bloody ages, and did rely on the clothes pegs again (it's not yet dry enough to test out)...

BTW the drivers are still connected because the connecting wires are soldered on, and I couldn't be arsed re-soldering.
Has anyone here ever tried this? If so, what glue did you use, I wasn't really impressed with either (though would definitely choose the Elmers over the Bison).
Also, I found that the removed surround (which obviously disintegrated into tiny pieces) ended up with the consistency of tar. I had newpaper down so it was mostly contained, but a few bits dropped onto my laminate flooring. It was easily enough to scrub it off that, but I wouldn't have fancied my chances on a carpet. So take care with that.
One final point. Many of the Youtube videos recommended removing the dustcaps during refoaming. This is because it allows spacers to be placed inbetween the voicecoil and the cone, the idea being that if re-glued off-centre the cone will rub against the coil creating a farting noise. I wanted to avoid removing the dust caps and took confidence from a few videos that showed how this could be avoided simply by testing for, and avoiding rub by hand and ear during the gluing process. This worked for me. Tbh it happened automatically, and no readjustment was needed from the first position I tried. Whether I was lucky, or this tends to be the case, I don't know.
Anyway, despite the shambles with the wrong glue, and my generally ham-fistedness I do enjoy these things, and am pleased I've rendered my JPW usable again.


Comments
Just fired them up. They do sound good. Ridiculously sensitive too (nothing to do with the refoaming I wouldn't imagine). Playing them through the AP10P and I can't push the volume anywhere near 9 o'clock at this time of the evening, so haven't been able to throw the woofers about to much yet. My hope is that when I do the new foams won't just fall out...
It's also brilliant to get stuck in, learn something new, and accomplish something, isn't it?
I have some baby JPWs, infinite baffle 2-ways with paper cone mid-bass and hardly a crossover. I love them, though they ought to last, having a kind of PVC surround (similar to the old Goodmans, actually).
And the speakers are still in one piece after a proper workout. Sound fine. Will definitely be hanging on to them. I'm keen to hear them on the end of the Claymore once that's sorted...
I understand Quickie has more than a few mods up his sleeve for these.
Thanks for the tips. Agreed on the glue. I was just, erm,,,experimenting. The 2nd effort has turned out looking fine. I'm not sure I'd do it again on anything other than a low risk/value project like the JPWs. I'm just too ham-fisted.